Writing JavaScript Libraries
This short tutorial will guide you through the process of creating and sharing a components library for Wonderland Engine.
Install npm
npm is the official package manager for the JavaScript ecosystem.
It now is part of the Wonderland Engine toolchain, to make it seamless for developers to use external dependencies. As a library creator, you will need npm to manage and publish your libraries.
You can download nodejs, that comes with a packaged npm installation.
Create the Library
For this tutorial, we will create a library in a folder called my-library. Change directory
to the my-library folder and run:
npm initSome prompts will appear asking you for information about your package:
package name: (my-library)
version: (1.0.0)
After filling the prompts, you will see a package.json file that looks like that:
{
  "name": "my-library",
  "version": "1.0.0",
  "description": "My Wonderland Engine first library!",
  "main": "index.js"
}
The package.json file contains all the necessary information about the library. When a developer
installs your library, npm finds the data it needs inside this file.
‘wonderlandengine’ Tag
Wonderland Editor automatically registers libraries based on a specific meta tag: wonderlandengine.
When creating a library to use with Wonderland Engine, you must add the following line to
your package.json, e.g., above "main": "index.js":
"wonderlandengine": {},For now, this is all you need for the editor to automatically pick up the library.
In the future, the wonderlandengine metadata object might allow specifying more properties
for Wonderland Engine.
Entry Point
One of the most important pieces is the index.js field. It specifies the file that should
be exporting your library objects. When a developer uses your library and imports it:
import {ComponentA, ComponentB} from 'my-library';'my-library' gets resolved to:
node_modules/my-library/index.jsThe entry point must thus export the public interface (classes, functions, etc…) of your library:
index.js
// Re-export components from other files
export {ComponentA} from './component-a.js';
export {ComponentB} from './component-b.js';

export {someUtilityFunction} from './someUtilityFunction.js';
When the wonderlandengine meta tag is found in a package.json, the entry point is used to
find all the exported components (ComponentA and ComponentB in the above example):
Dependencies
In this tutorial, we will create a component that uses Wonderland Engine’s public API.
We add it as a dependency in the package.json. Below "dependencies", we add a new section
"peerDependencies":
  "dependencies": {
  },
  "peerDependencies": {
    "@wonderlandengine/api": "^1.0.0"
  }
This is important, as we want to allow the user to use a range of API versions with a library, usually up to the next major release version.
To be able to use the API, you next have to run npm install to apply changes in your package.json:
npm installAdd Content
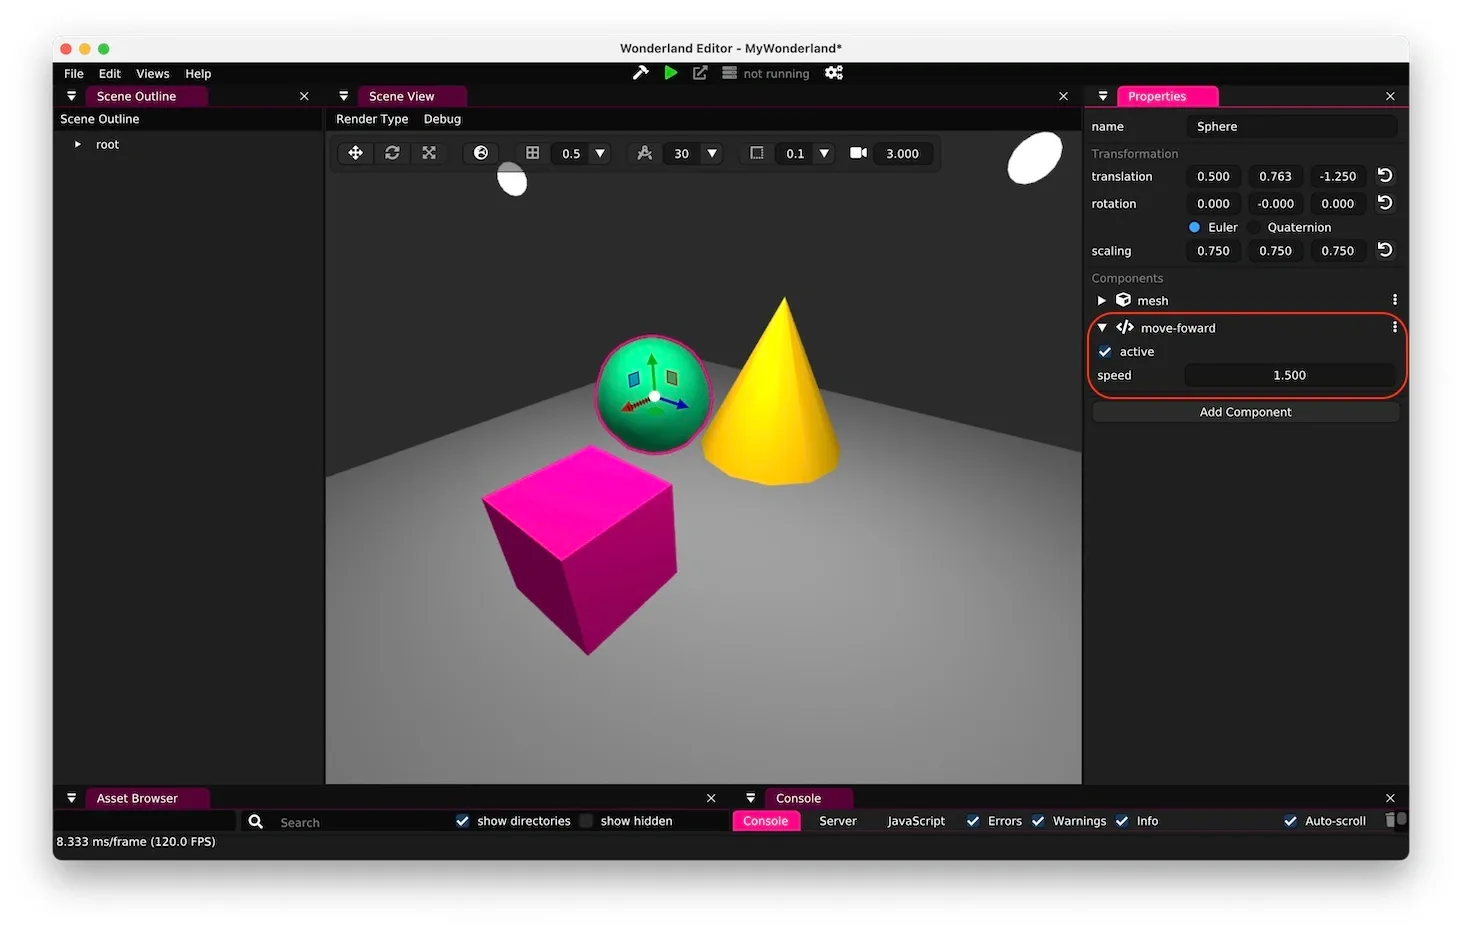
For this tutorial, we will create a simple component that moves its object forward with some speed.
Create a new file called move-forward.js in your library folder with the following content:
move-forward.js
import {Component, Property} from '@wonderlandengine/api';

const tempVec = new Float32Array(3);

export class MoveForward extends Component {
    static TypeName = 'move-forward';
    static Properties = {
        speed: Property.float(1.5),
    };

    update(dt) {
        this.object.getForward(tempVec);

        tempVec[0] *= this.speed;
        tempVec[1] *= this.speed;
        tempVec[2] *= this.speed;

        this.object.translate(tempVec);
    }
}
We also need to re-export this component to the developer using our package. We can
update the index.js file with:
index.js
export {MoveForward} from './move-forward.js';For this example, we could have put the component into the index.js directly. However,
the more your library grows, the greater the control you will want to have over your exports.
Testing & Debugging
Testing can be done by creating a Wonderland Engine project and installing your library using a local path.
For this tutorial, we will assume a Wonderland Engine project is created with the name MyWonderland.
In the project’s root, you can run:
npm install path/to/my-libraryYou will need to replace path/to/my-library with a path pointing to the root of the library folder.
That’s it! You should now have access to the MoveForward component in your project.
In this case, the library is installed locally. Other developers will not have access to the library. You either need to:
- Publish the library (as described in the Publish the Library section)
- Or provide a local package (e.g., as .tar.gz) for them to install
Publish the Library
By publishing the library as a package on the npm package repository, you mark a certain version of the code with a version number and upload the package to the npm servers for download by other developers.
Login
To publish your library to npm, you need to:
Publish
When logged in, you can publish your package by navigating into the library folder with a terminal and running:
npm run publishYou can also run a “dry” publish using:
npm run publish --dry-runThis command will print information about the files to be published and allows verifying that you are not publishing unwanted files.
Install
With your library successfully published, you can install it by going in your project and running:
npm install --save my-libraryYou are now ready to create the most wonderful libraries.
Creating libraries helps the community thrive and develop amazing WebXR content for all.