3D UI with React in Wonderland Engine
With Wonderland Engine, integrating React-based 3D UI elements has become a straightforward process. This guide will walk you through setting up and using the @wonderlandengine/react-ui library to create interactive and performant 3D UIs.
Install via NPM
Run the following command to install the library in the project root directory:
npm i @wonderlandengine/react-uiOr, edit package.json and add "@wonderlandengine/react-ui": "lastest" in the "dependencies" section,
Wonderland Editor will automatically install new dependencies.
Configure TypeScript
Add the following to your project’s tsconfig.json file:
{
  "compilerOptions": {
    "jsx": "react"
  }
}Configure esbuild
- Open “Views > Project Settings > esbuildFlagsEditor”.
- Add
--bundleto the flags.
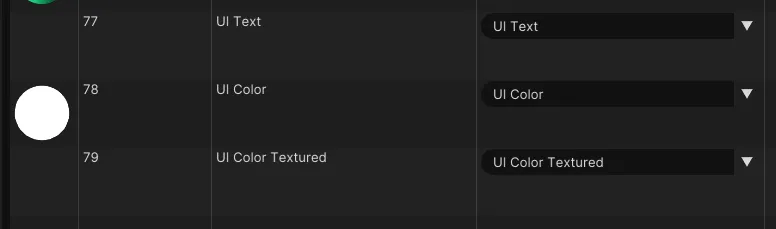
Configure Pipelines and Materials
You need to set up three pipelines for rendering your UI:
UI Text Pipeline
- Create a new
Textpipeline by “Right-Click > Duplicate” on the existing Text pipeline. - Change its name to
UI Text. - Configure it with the following Depth settings:
depthTestanddepthWritechecked; depthFunction set toalways.

UI Color Pipeline
- Create a new
Flatpipeline by duplicating the existing one. - Change the name to
UI Color. - Also configure it with the following Depth settings: depthTest and depthWrite checked; depthFunction set to
always.

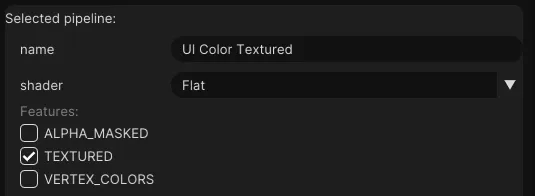
UI Color Textured Pipeline
- Duplicate the
UI Colorpipeline. - Rename this to
UI Color Textured. - Enable the
TEXTUREDfeature.
Create Materials
- Create 3 new materials in
Resources > Materials. - Rename the materials to
UI Text,UI Color, andUI Color Textured. - Set the pipelines of these materials to the pipelines created earlier.
Create a React UI
Add a file named tutorial-ui.tsx to the js folder and add the following code:
import {ReactUiBase} from '@wonderlandengine/react-ui';
import {Container, Text} from '@wonderlandengine/react-ui/components';
import React, {ReactNode} from 'react';

const App = (props: {comp: TutorialUI}) => {
    const comp = props.comp;

    return (
        <Container>
            <Text>Hello World</Text>
        </Container>
    );
}

export class TutorialUI extends ReactUiBase {
    static TypeName = 'tutorial-ui';
    static InheritProperties = true;

    render(): ReactNode {
        return <App comp={this} />;
    }
}
Add the UI into the Scene
- Create a new object.
- Add the
tutorial-uicomponent to this object. - Set the materials to the materials created above.
Launch into the browser using the green arrow above the scene view.
Conclusion
You have successfully set up the @wonderlandengine/react-ui framework to create
React-based 3D UI in Wonderland Engine.