
Vertex Color Baked Lighting with Wonderland Engine
For their Mini-Golf game “Above Paradowski”, Colin Freeman, Ayushman Johri and James Kane used an awesome technique to bake lighting in their scene. They saved lightmap texture lookups in the fragment shader while achieving a highly polished look for their experience.
In this article, we are going to highlight why this technique is smart and how you can use it in Wonderland Engine.
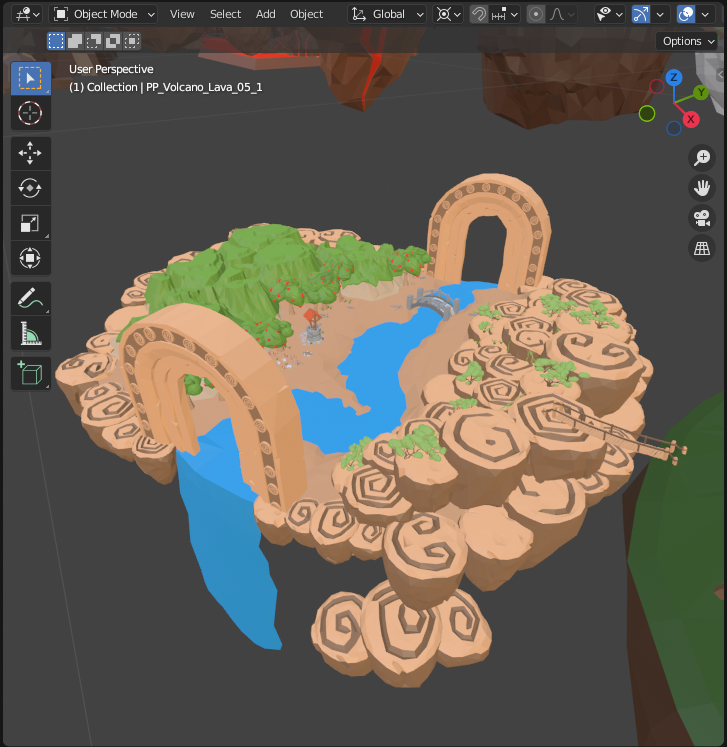
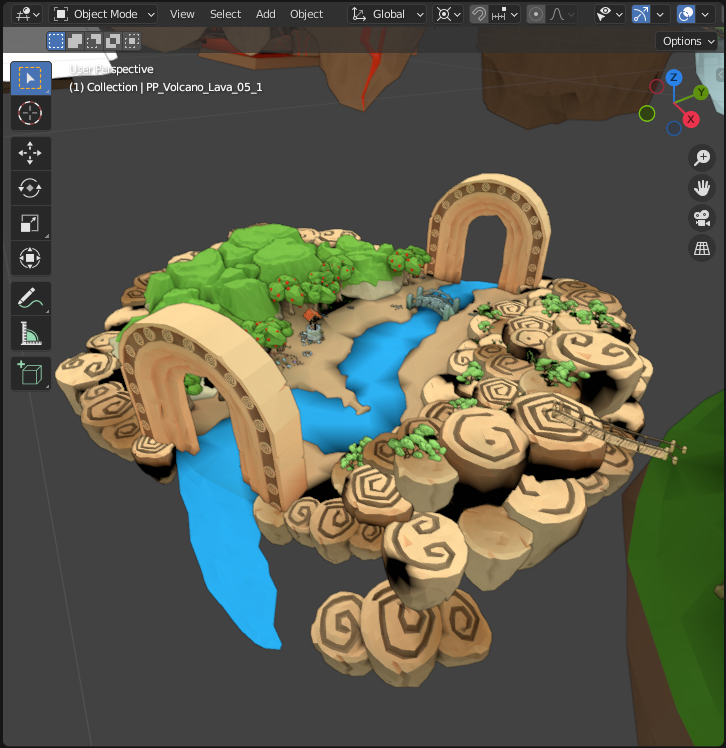
Screenshot of a floating island in Blender: flat lighting (left), baked vertex colors (right).
Motivation
Computing lighting takes a long time. For a realistic result, you need to trace light paths and bounces, each bounce resulting in more light paths and bounces to calculate. The amount of work explodes!
This is how animated movies are rendered, but in real-time VR, instead of minutes per frame, we have around 11 millisecond for two frames (left and right eye) at 90 Hz for Standalone VR devices. Instead of GPU render farms, we have a mobile GPU.
As maintaining 60-90 Hz is important for comfort and immersion in VR, we need to approach the problem in a different way. Wonderland Engine already implements many great methods and optimizations to render this fast, even with real-time shadows, but for extremely large scenes, we need every bit of performance we can get.
Light Baking
Instead of computing lighting at runtime, we can compute it upfront and store the result in our asset, for example by drawing or computing shadows onto our textures. This process is called “baking”.
We can even use the same methods used in 3D animation and thereby get very realistic results.
Textures work well, as they allow storing a high amount of detail with fine shadows and lighting effects. Especially with Wonderland Engine’s texture streaming, you can use very high resolution textures and get amazing looking scenes.
Textures require a lot of data to store, though, even when compressed well. Instead, we can trade some detail for download size and store an additional color attribute in your mesh per vertex.
Lightmap Textures vs Vertex Colors
When baking lighting to textures, our light computation on the GPU is mostly reduced to a texture read: for each pixel that we render to the screen, we look up the correct pixel in the lightmap. Every rendered pixel can fetch a different color from the lightmap, allowing very high-frequency details.
Vertex colors on the other hand are input to the vertex shader and interpolated between vertices. The frequency of detail will depend on the resolution of your mesh and is generally very low. This reduces the computation of the pixel color even further to just passing through the interpolated color from the vertex shader to the output framebuffer.
Performance
What is more performant? The answer for any performance question always is: it depends. Especially on your bottlenecks.
Many WebXR apps today are draw call bound: the CPU cannot do more work, so optimizing the GPU workload has no effect. Possibly on battery life, but not on your frame rate.
Wonderland Engine solves this entirely with its optimizations, rendering tens of thousands of dynamic objects in less than ten draw calls in almost every case. That some other apps are vertex shading bound by skinning many animated characters is solved with a highly performant VR-optimized skinning method that can process hundreds of different skinned meshes efficiently.
But even Wonderland Engine apps may end up being limited by fragment shading. More instructions and more expensive operations in your fragment shader require more computational power from the GPU per pixel on screen. Our “Physical” (PBR) shader has more instructions than “Phong”, which has more than “Flat”.
While modern GPUs are very fast at reading textures, merely reading the colors from the mesh data during vertex fetch will be more cache efficient and is hard to beat, especially if this also means that you can omit normals and texture coordinates from your mesh entirely. For this technique, we can use an untextured Flat shader that requires only positions and colors.
This leaves a smaller amount of memory to read per vertex and barely any work to do per fragment. This would leave us limited only by vertex shading or vertex fetching, but only at very impressive vertex counts in our scene as shown in Summary.
Tutorial
We start by baking lighting to vertex colors in Blender and then import the model in Wonderland Engine.
Bake to Vertex Colors in Blender
Choose a scene and set up lights. Blender already has full support for baking to vertex colors, so no plugins needed, the setup is straight forward:
- Open a scripting window in Blender and use the following python script to add a vertex color layer to all selected objects, by running this script:
import bpy

for o in bpy.context.selected_objects:
    if o.type != 'MESH':
        continue
    if len(o.data.vertex_colors) != 0:
        continue

o.data.vertex_colors.new()- In the Render Properties, switch the render engine to Cycles
- Find the Bake section further below and switch Output > Target to Vertex Colors
- Set the Bake Type to Diffuse
- Hit the Bake button at the top of this section
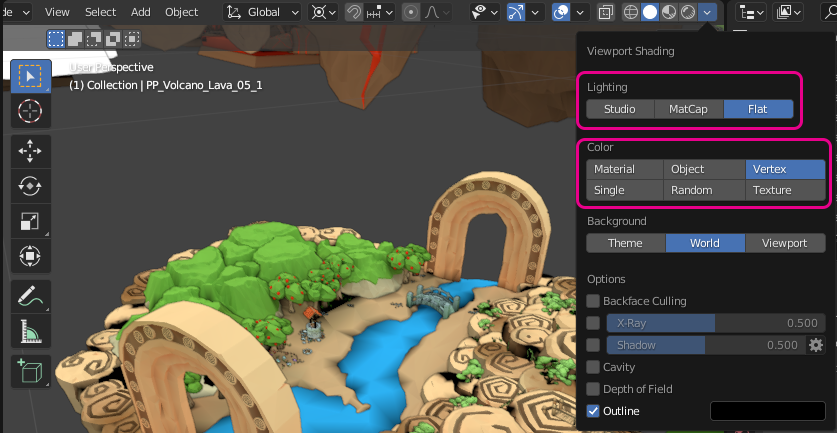
To view the result, you can set the viewport settings to visualize the result:
- In the 3D Viewport find the arrow next to the render types (usually the most right button in the top menu)
- For Lighting select Flat
- For Color select Vertex
Finally export the model as GLB by selecting File > Export > glTF 2.0 (.glb/.gltf).
Import into Wonderland Engine
Create the following VertexColor.frag in a subfolder shaders in your project:
#include "lib/Compatibility.frag"

#define USE_COLOR

#define USE_MATERIAL_ID
#include "lib/Inputs.frag"

void main() {
    outColor = fragColor;
}
Next, we import the model into Wonderland Engine and use this shader to render it:
- Drag and drop the
.glbfile into the Asset Browser - From there, drag it into the scene view
- Go to Views > Resources > Pipelines and select Phong Opaque or Phong Opaque Textured, depending on whether your objects initially were using textures.
- Change the shader to the new
VertexColorshader.
By changing the existing Phong pipeline, we can automatically change all materials. A cleaner setup would be to assign the automatically created “VertexColor” pipeline and assign it to all the materials we want to change.
Now you should see the vertex colors correctly applied to your scene.
Summary
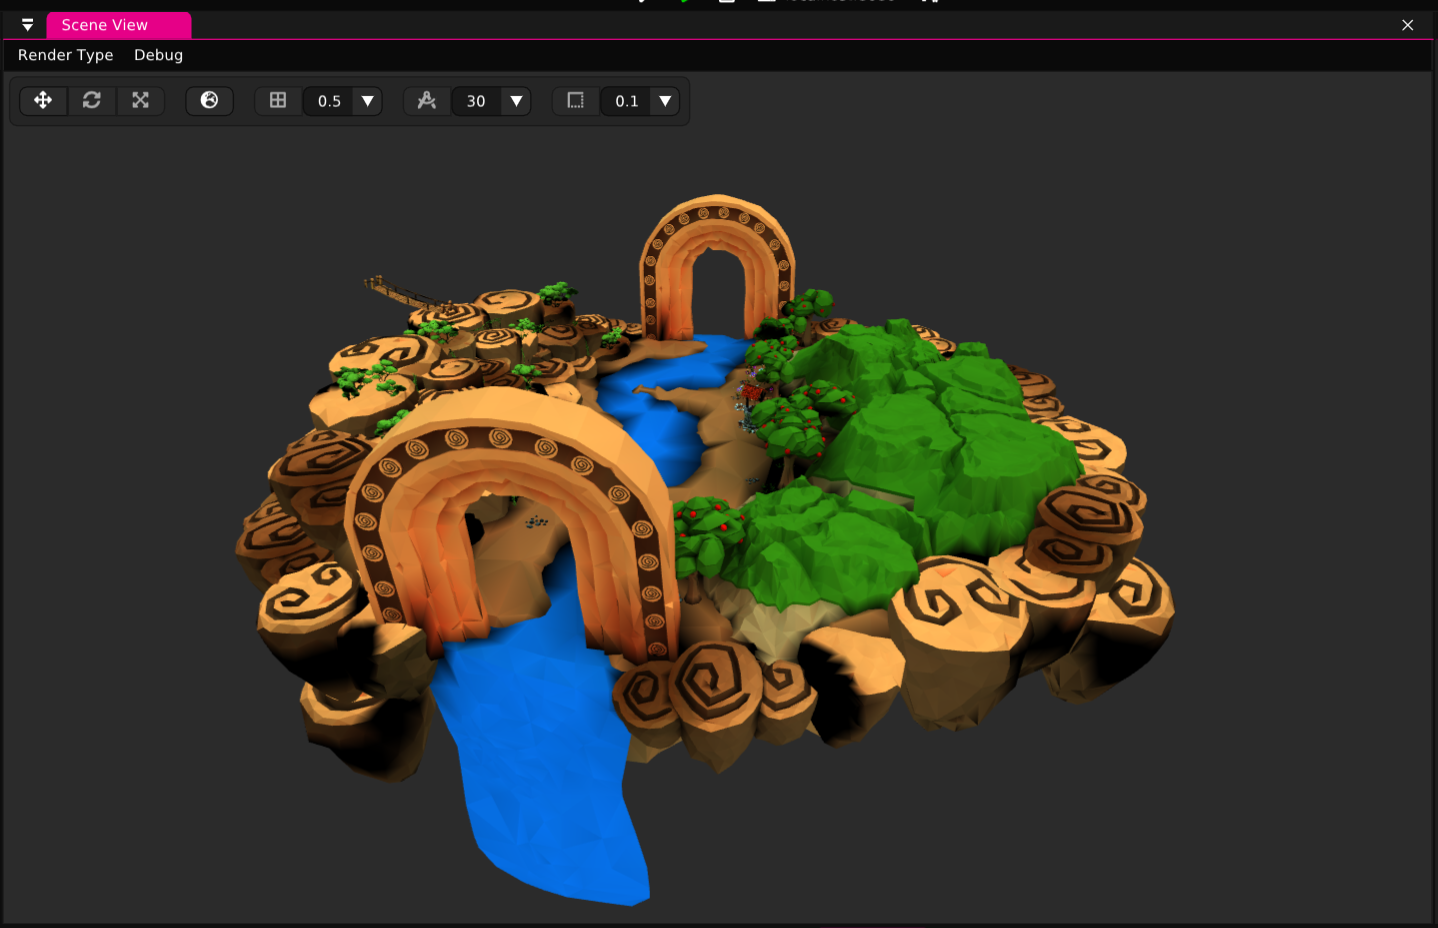
Baking lighting to vertex colors is a very efficient way to achieve beautiful looking visuals. The following video demonstrates 3.6 Million vertices rendered with this method at 60-72 fps on Meta Quest 2 in the Meta Quest Browser.
The demo uses Wonderland Engine out-of-the-box optimizations, fixed-foveation (at 1.0) and the method described in this blog post. The scene is rendered in 2 draw calls (as of 0.9.4, upcoming support for multiview rendering will cut this by 50%). Every object could still be moved independently via scripts or animation without negatively impacting performance.