Build a Discord Activity with Wonderland Engine
Want to create a Discord Activity? Because Discord Activities are web-based, Wonderland Engine is a great fit, if you want highly performant 3D rendering in your game.
Here is a step-by-step guide to get you started!
Wonderland Engine Project example project
Let’s start by cloning the Discord Activity example repository to your local machine.
git clone https://github.com/WonderlandEngine/discord-activity-example.gitNext, we need to create and setup our new Discord Activity in the Discord Developer Portal to run the example code.
Create a New Discord Application
Start by crewating a new Application in the Discord Developer Portal. Once you did,
copy and save the APPLICATION_ID as DISCORD_CLIENT_ID in the index.js file of the example code.
Now make a copy the example.env file and save it as .env. Inside, replace the DISCORD_CLIENT_ID with your APPLICATION_ID.

Now, let’s setup the Oauth flow to allow our Discord Activity to authenticate the user and get user info:
Open the OAuth2 menu of your Discord Activity. Enter http://127.0.0.1 as a redirect URI. Next, click Reset Secret to generate a new DISCORD_CLIENT_SECRET. Replace the DISCORD_CLIENT_SECRET in your local .env file with the secret you just generated.

Finally, enable the Activity so it can be launched from channels.
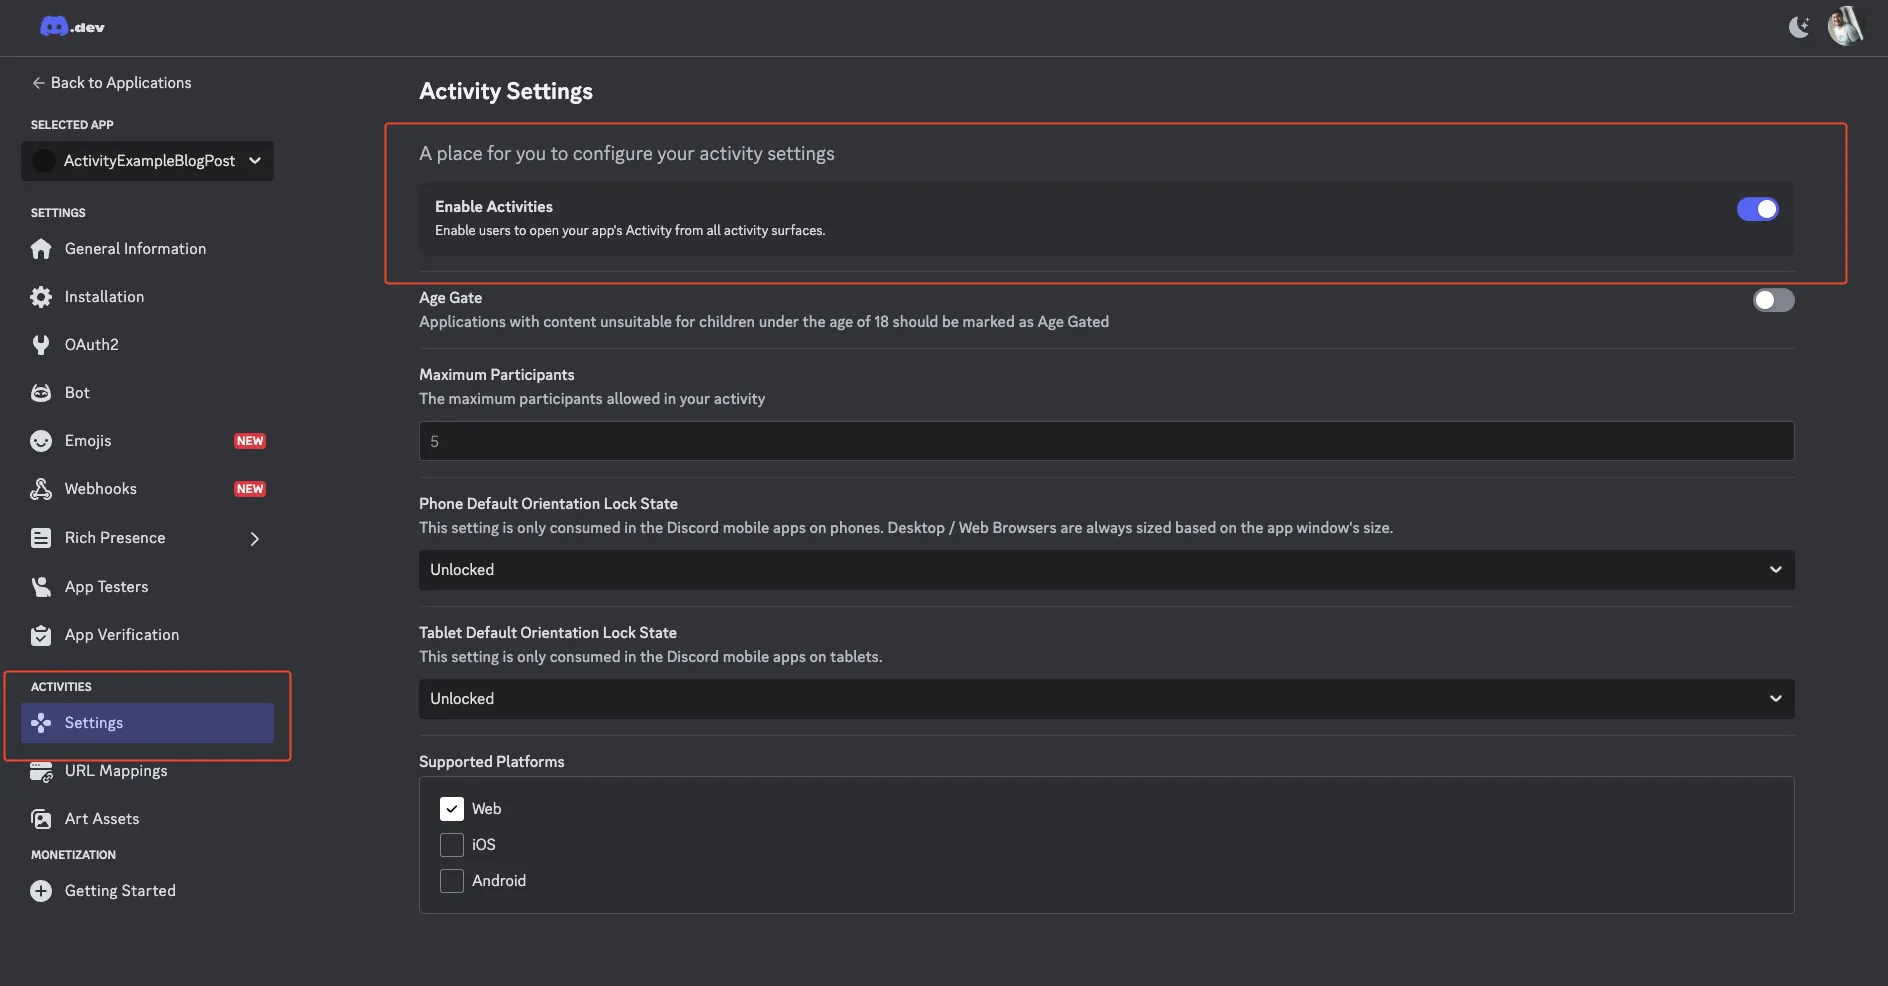
To be able to start the activity, you need to add it to the apps of your Discord account.
You do this by finding the Installation section of your Activity and opening the install link in your browser.
Once open, click Add to my Apps.

You can find the full guide on how to set up and run a Discord Activity in the Discord Docs
Running Locally
We are close to seeing our game inside Discord! Open a terminal and step into your server folder. Here, run npm install to install all dependencies.
Then follow the steps below to connect to your activity locally.
- (Inside the
serverfolder) Run the server withnpm run devandnpm run tunnel:
Requesting new quick Tunnel on trycloudflare.com...
+--------------------------------------------------------------------------------------------+
|  Your quick Tunnel has been created! Visit it at (it may take some time to be reachable):  |
|  https://alice-in-wonderland.trycloudflare.com                                             |
+--------------------------------------------------------------------------------------------+- In the Discord Developer portal, update the URL mapping of your Discord app to map
/to the URL provided by the cloudflare tunnel.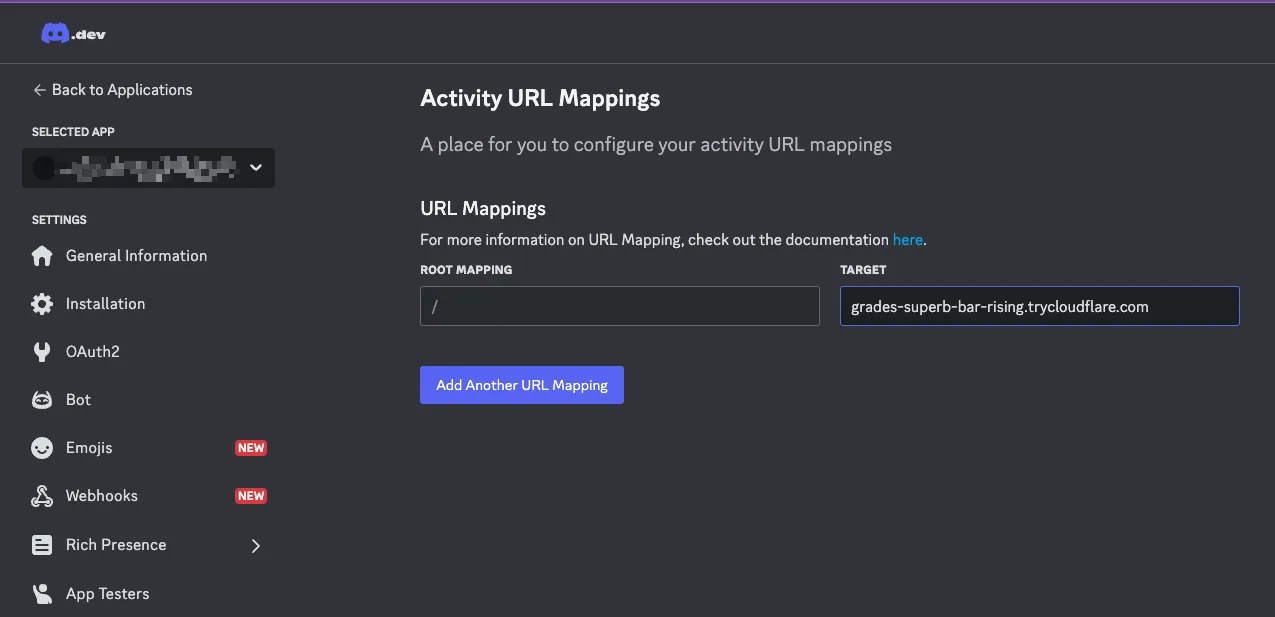
- Open
DiscordActivityExample.wlpin Wonderland Editor. - Enable developer mode on your Discord client.
The npm server we started with npm run dev will reverse proxy Wonderland Editor’s webserver and websockets through the cloudflare tunnel.
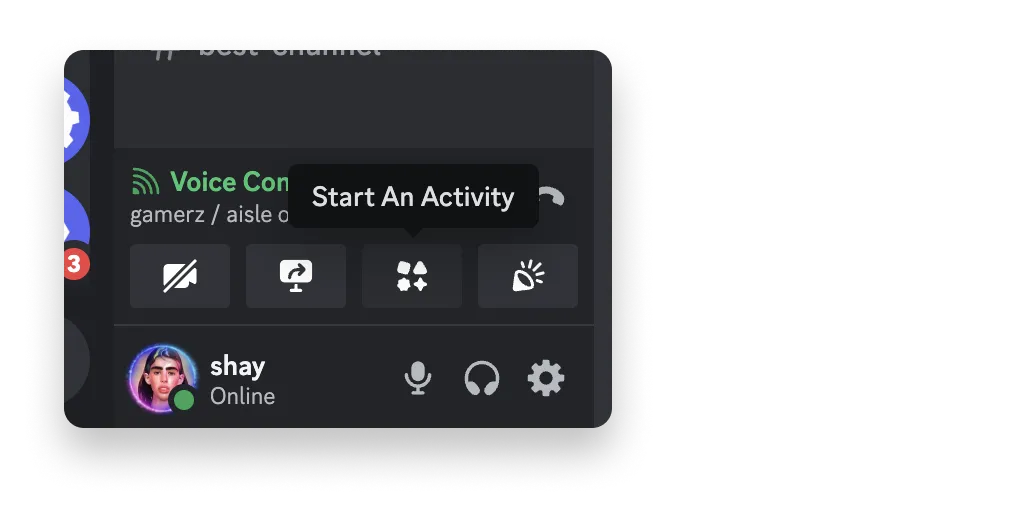
Start the Activity
Navigate to your Discord test server and, in any voice and or text channel, open the App Launcher where your in-development Activity should be present. If you don’t see your Activity, you should try searching for its name.
Clicking on your app will launch your locally running app from inside Discord!
Deployment to Wonderland Cloud
Let’s install the Wonderland Cloud CLI to deploy our Wonderland Engine project to Wonderland Cloud and also deploy and link the Discord authentication service.
npm install -g @wonderlandcloud/cliCreate a Wonderland API token on your Wonderland Engine Account page and save it as wle-apitoken.json in your project’s root directory.
Now let’s walk through the necessary adjustments to the deployment scripts step-by-step, which we will later run to deploy the frontend and the backend code to Wonderland Cloud:
create-activity-page: creates a new project deployment. Note the full name of your created project.build-server: builds the docker image. Replace<ImageTag>with a Docker image tag name of your choice.push-server: publishes your docker image.create-api: publishes the Discord authentication service. Replace the placeholders: You can get yourDISCORD_CLIENT_SECRETfrom the Discord App’s oauth page. This will create a new Wonderland Cloud API deployment.create-api-path: will link the API deployment to your page domain on the ‘/api’ path.
Finally let’s add the project domain we got from the deployment to Wonderland Cloud to the Discord App’s URL mapping.
If you don’t know the domain, you can find it inside the deployment.json file, which is created after a successful deployment to Wonderland Cloud.
If you have followed all the steps correctly, you should be able to start your Discord Activity. Upon joining it you should get authorization confirmation window and after clicking it, the welcome message should change and contain your name.
Otherwise, please join our Discord Server, and we will be happy to assist!