Quick Start
Welcome to Wonderland Engine. Please install the Wonderland Editor before continuing with this tutorial.
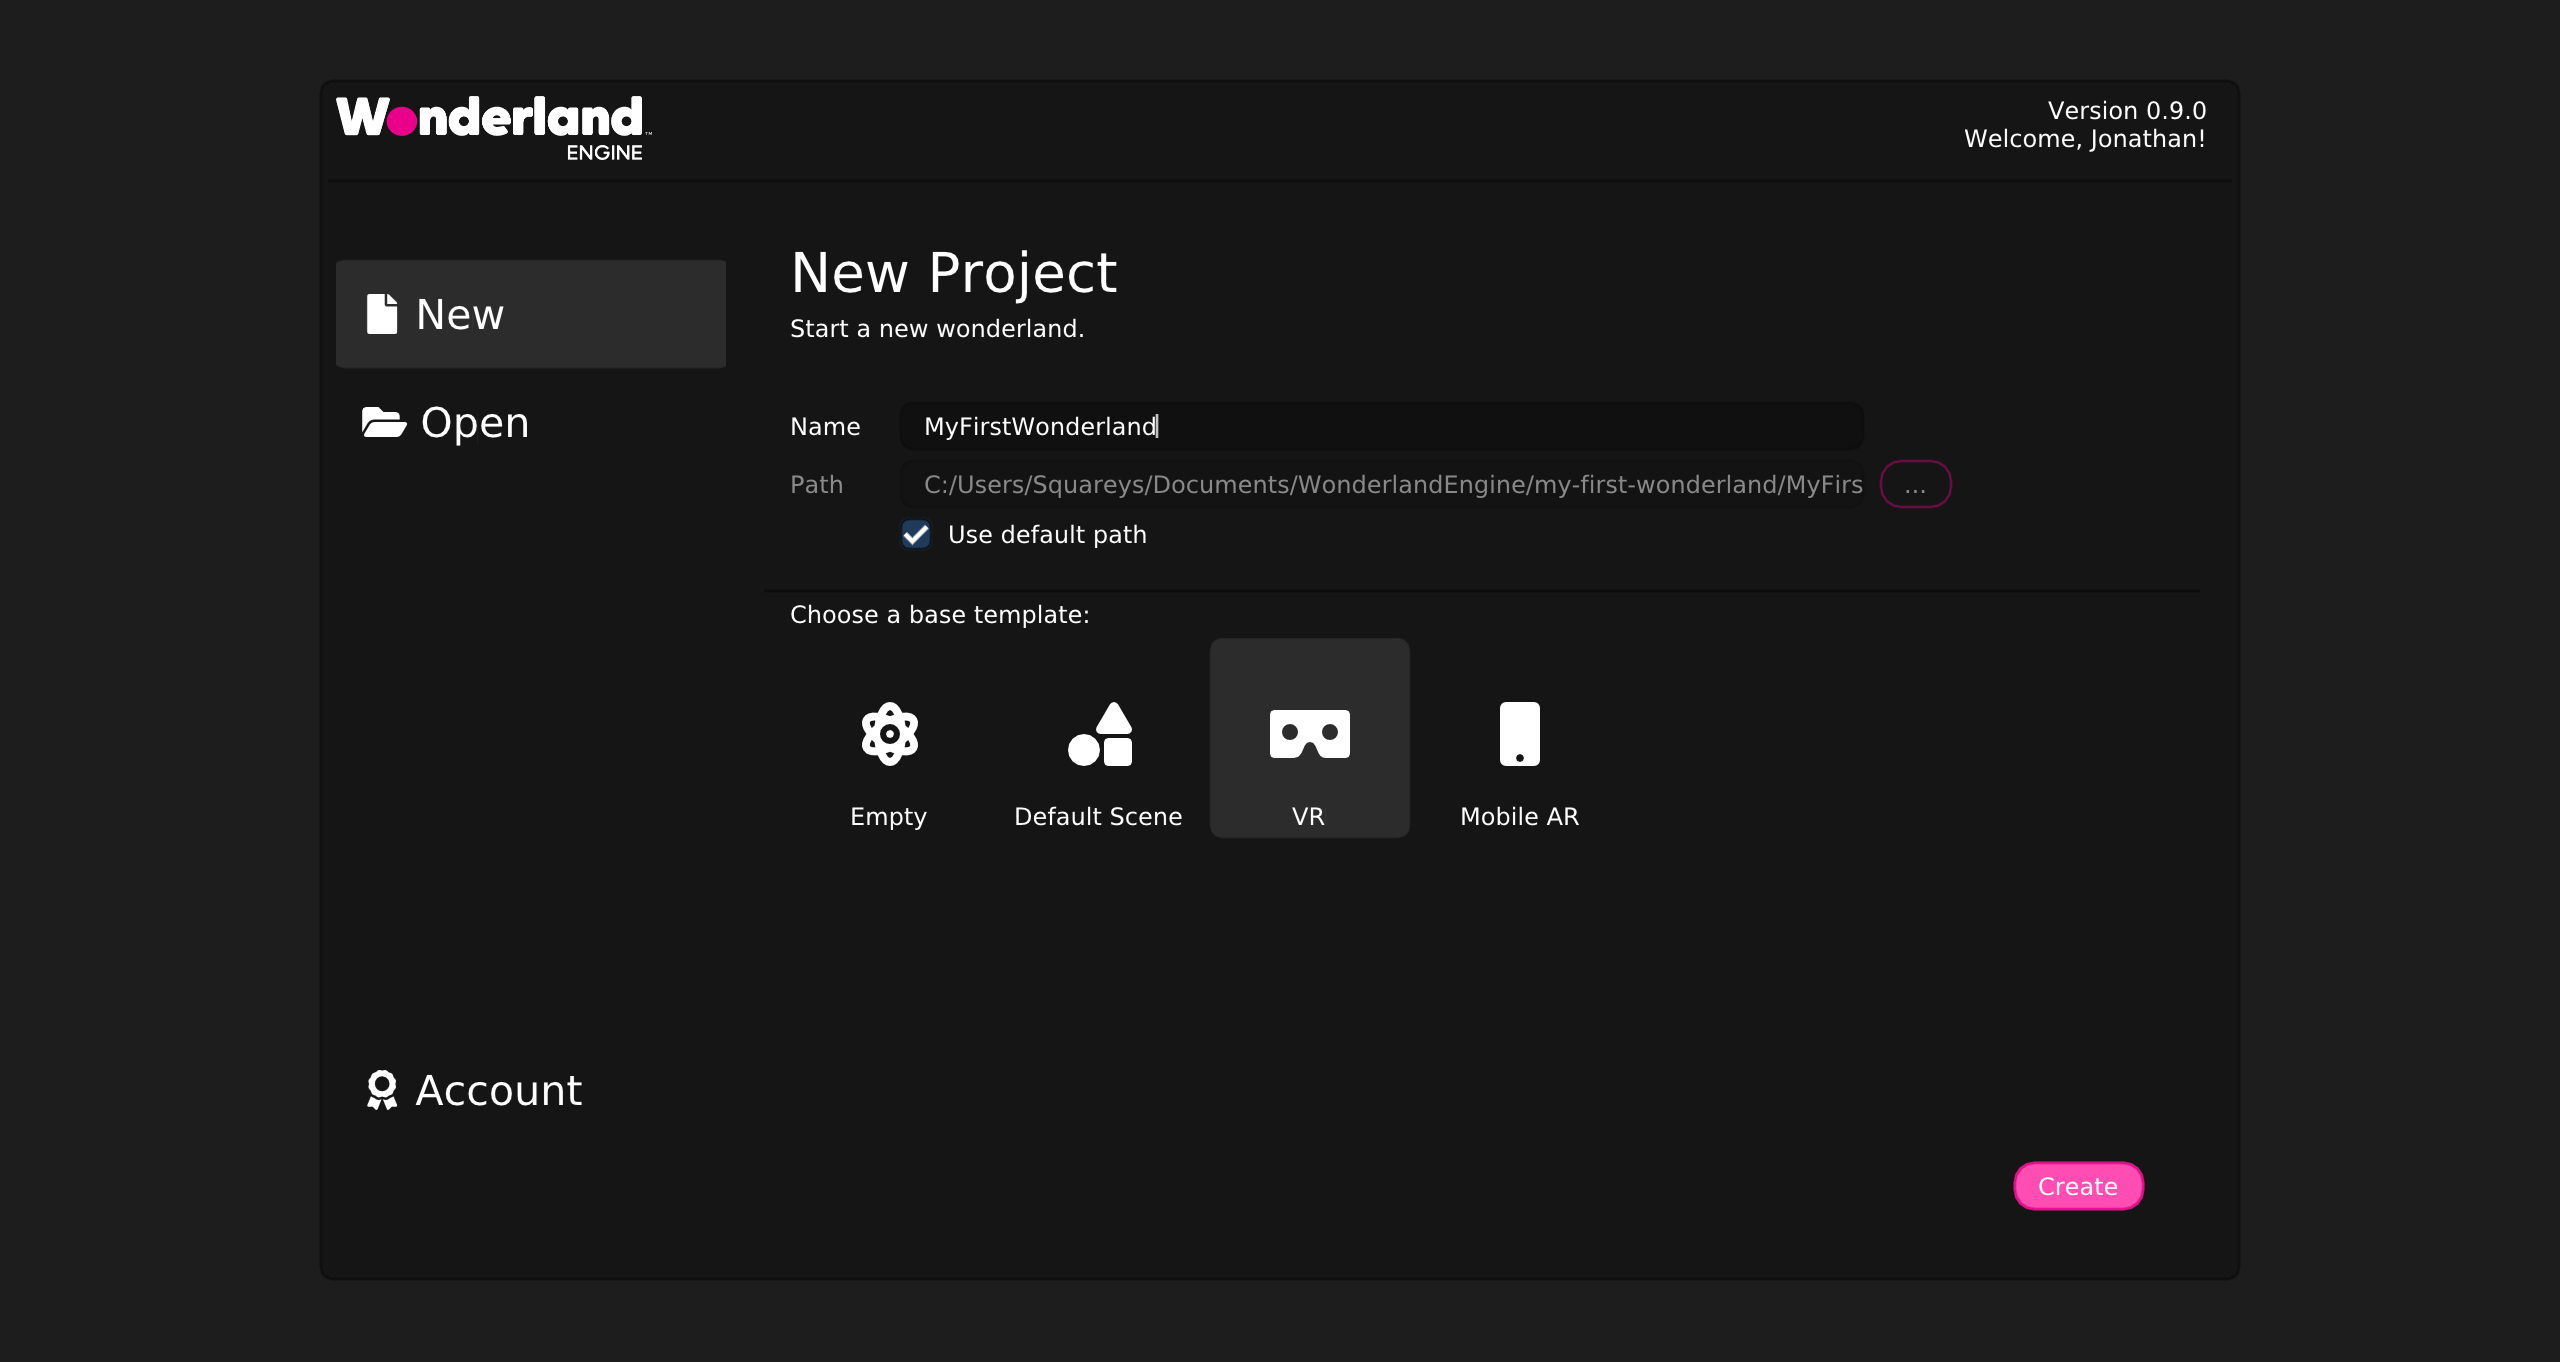
Create a Project
Enter a project name of your choice and create the project through the “Project Wizard” that launches when you start the editor for the first time.
Choose the “VR” template.
You are presented with a basic project that has VR teleportation set up. Pretty boring! We should add an asset here.
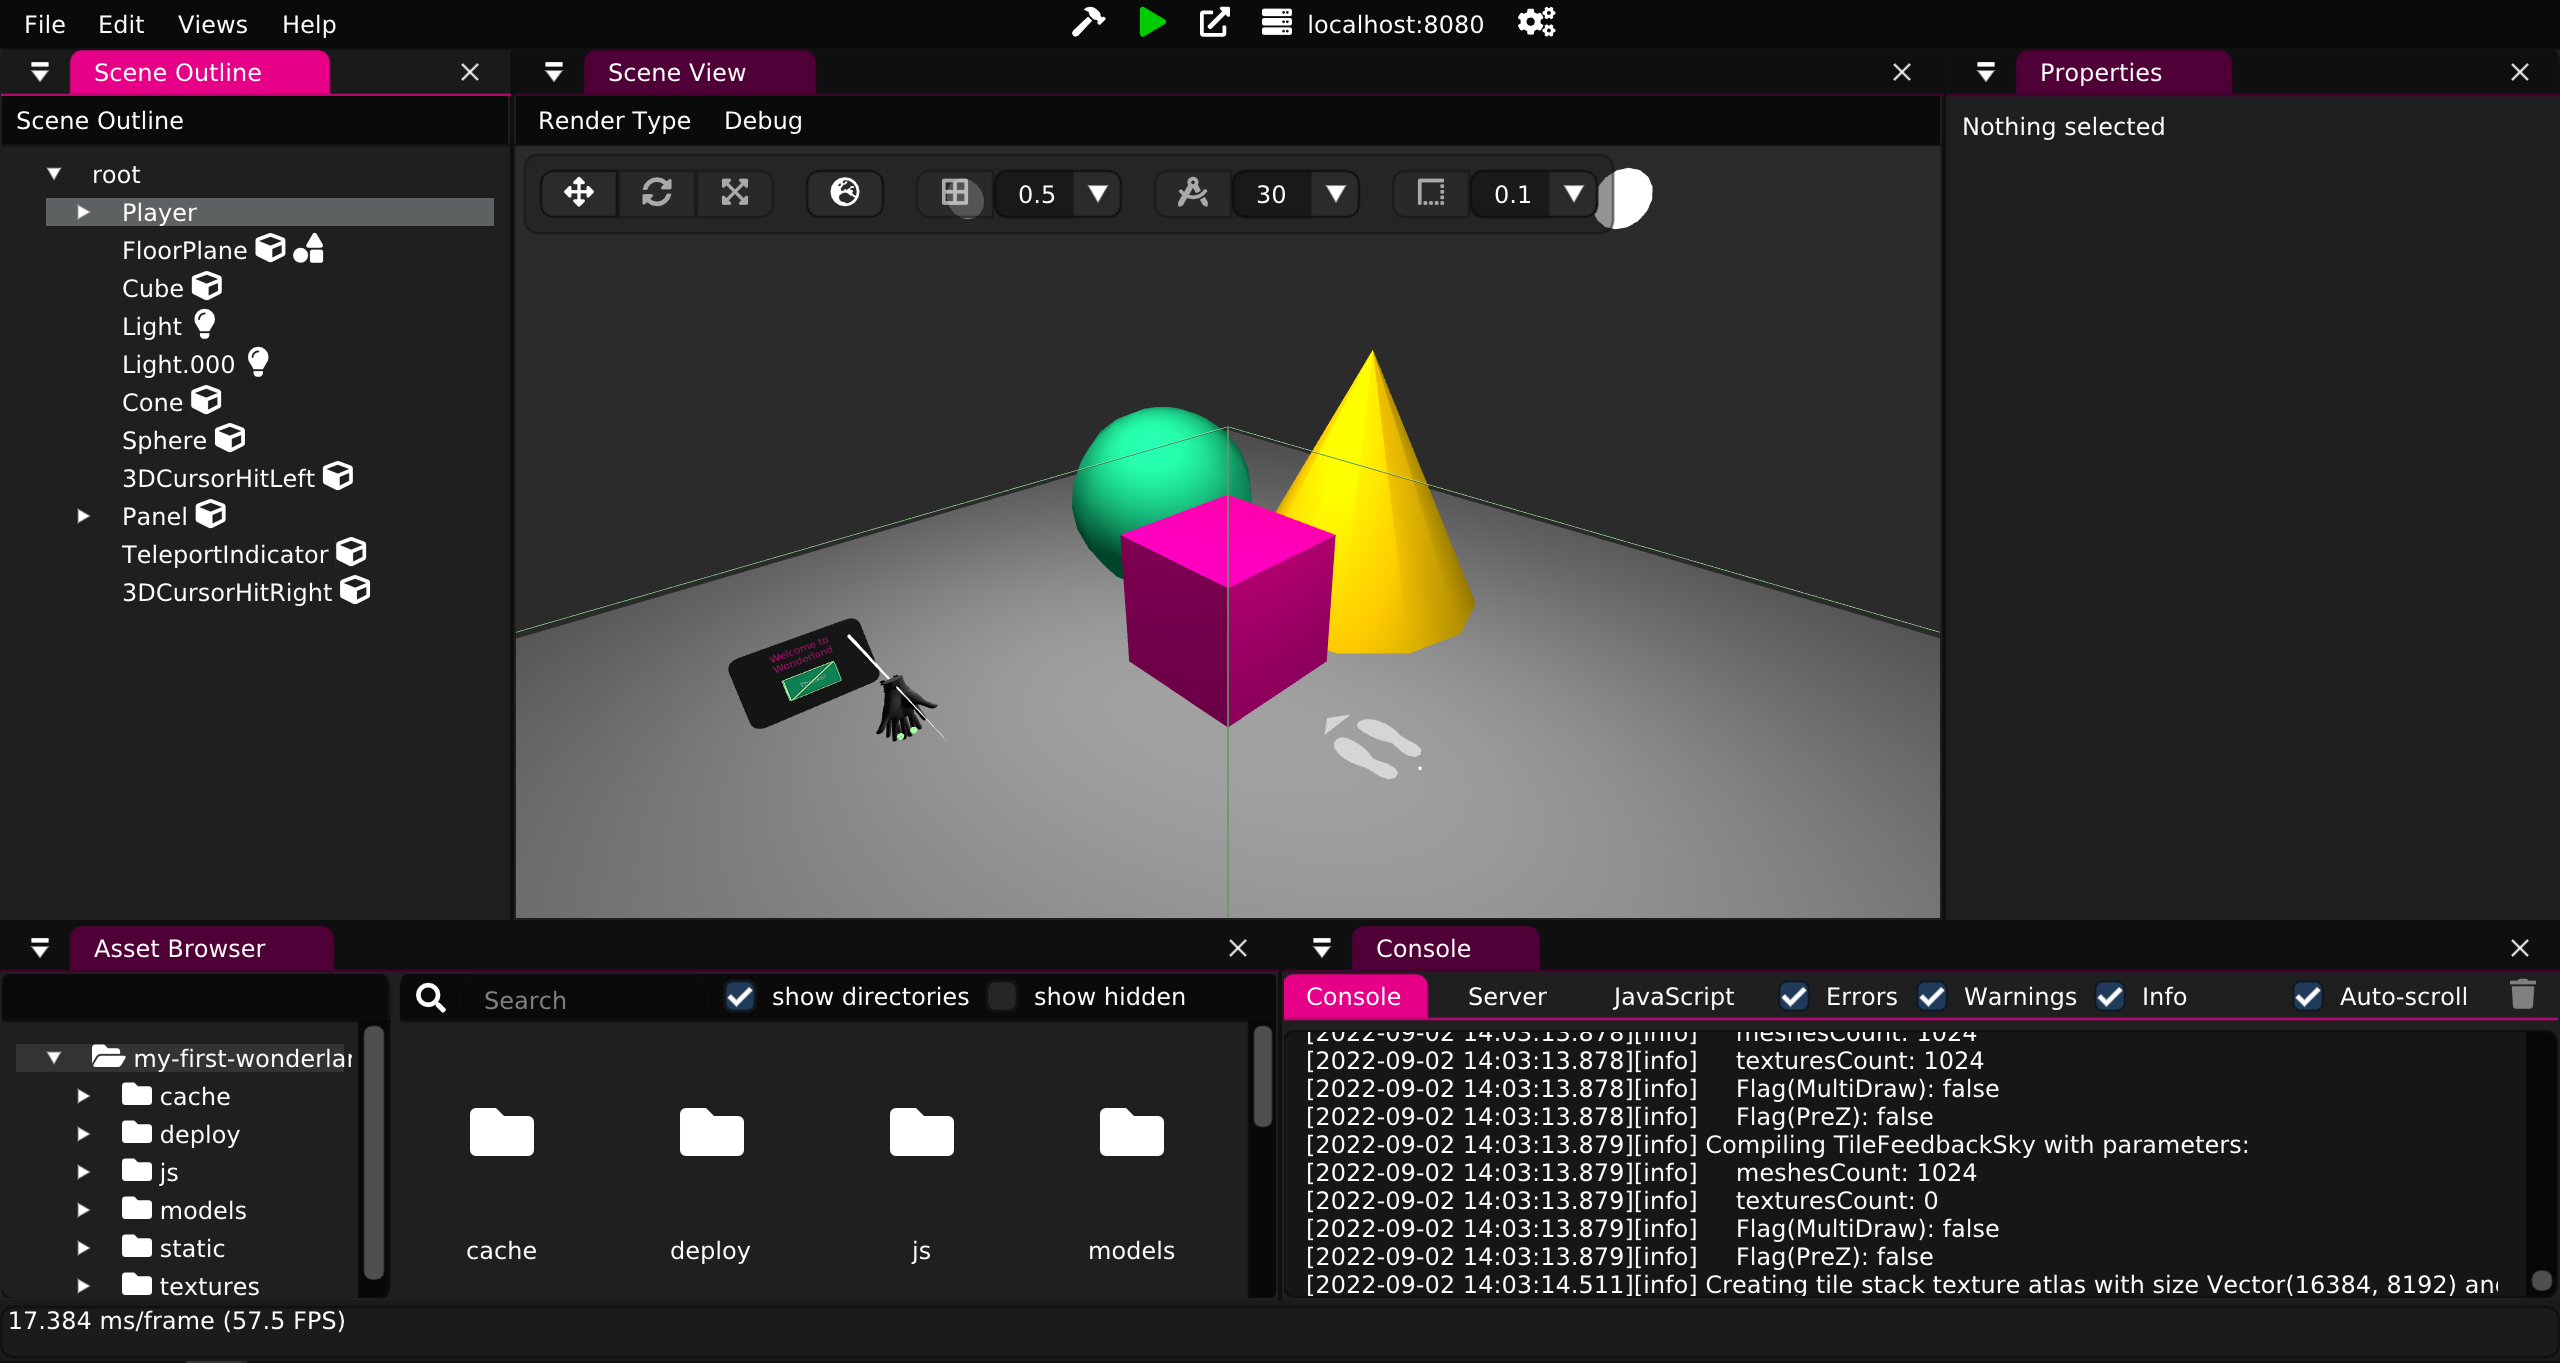
On the bottom left you see the “Asset Browser”. It shows the contents of the project’s directory. All assets for the project should be placed into this directory.
Run in the Browser
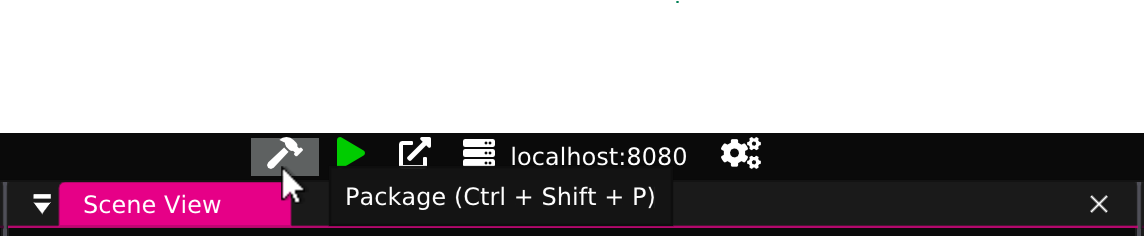
To package the project and view it in the browser, click on the green arrow at the top of the window:

Now, whenever we “package” the project (by clicking the 🔨 icon), the browser will automatically reload with our changes.
Remove Objects
With the VR template, we get some lights, objects and most importantly: the player setup.
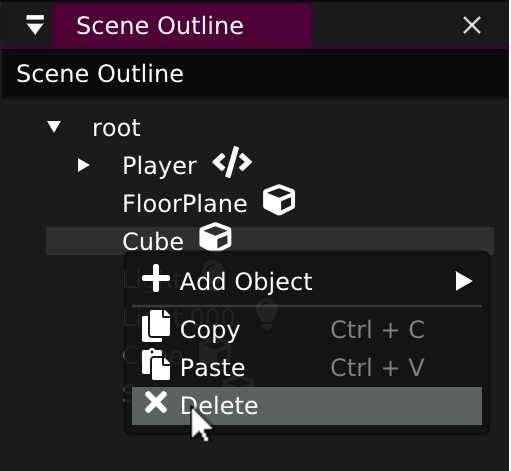
We do not need all objects. Delete them by selecting them with left mouse-click and then either delete them by right-clicking in the “Scene Outline”, or by pressing the “Del” key.
Delete these:
- Cube
- Sphere
- Cone
- Panel
Make sure to keep:
- Player
- Light
- Light.000
- 3DCursorHitLeft / 3DCursorHitRight
- TeleportIndicator
Modify the Navigation Mesh
The plane we kept has a “collision” component attached, which defines the shape of the object for collision and ray casts.
In this case it is used for teleport navigation. In the next step, we will be adding a scene that already has a floor, so we will remove the mesh, but keep the collision.
Click on the plane, then in the “Properties” click ⋮ (vertical dots) on the “mesh” component, finally “Delete”:
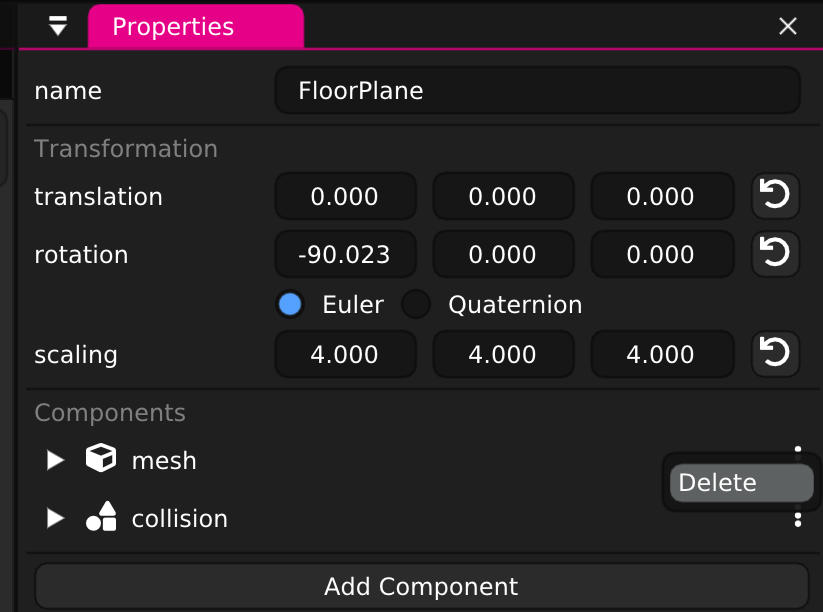
You will see that the green lines for the collision component are kept, while the mesh for rendering disappeared. In the browser, this collision visualization does not appear by default.
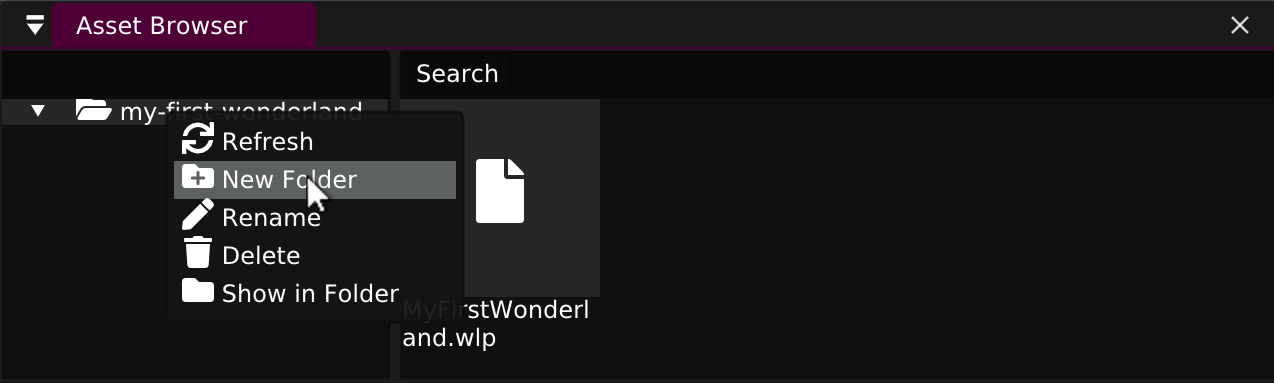
Add an Asset
Create a new folder assets by right-clicking on the root directory and
selecting “New folder”.
Download low_poly_winter_scene.zip and extract it or drag and drop the files into that new folder in the Asset Browser. If you use WinRAR you can also drag and drop the files directly from WinRAR.
This beautiful scene was created by “EdwinRC” and can be
found on Sketchfab.
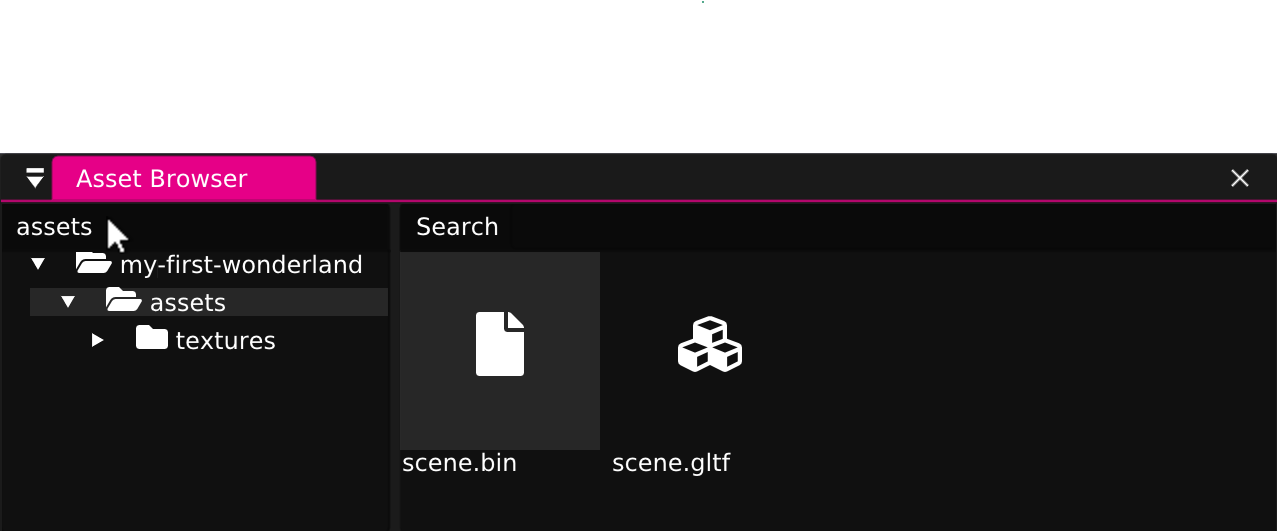
To import the scene, simply drag and drop scene.gltf (not the scene.bin) into the “Scene View”.
Alternatively you can drag and drop it directly onto an existing object in
the “Scene Outline”.

Look Around
To look around in the “Scene View”, hold down the right mouse button while moving the mouse. Use W-A-S-D keys to move forward, left, back and right while still holding down the right mouse button. To increase the speed, scroll up, while still holding down the right mouse button.
You can also hold the mouse-wheel button (hold Alt on MacOS) to orbit around the scene.
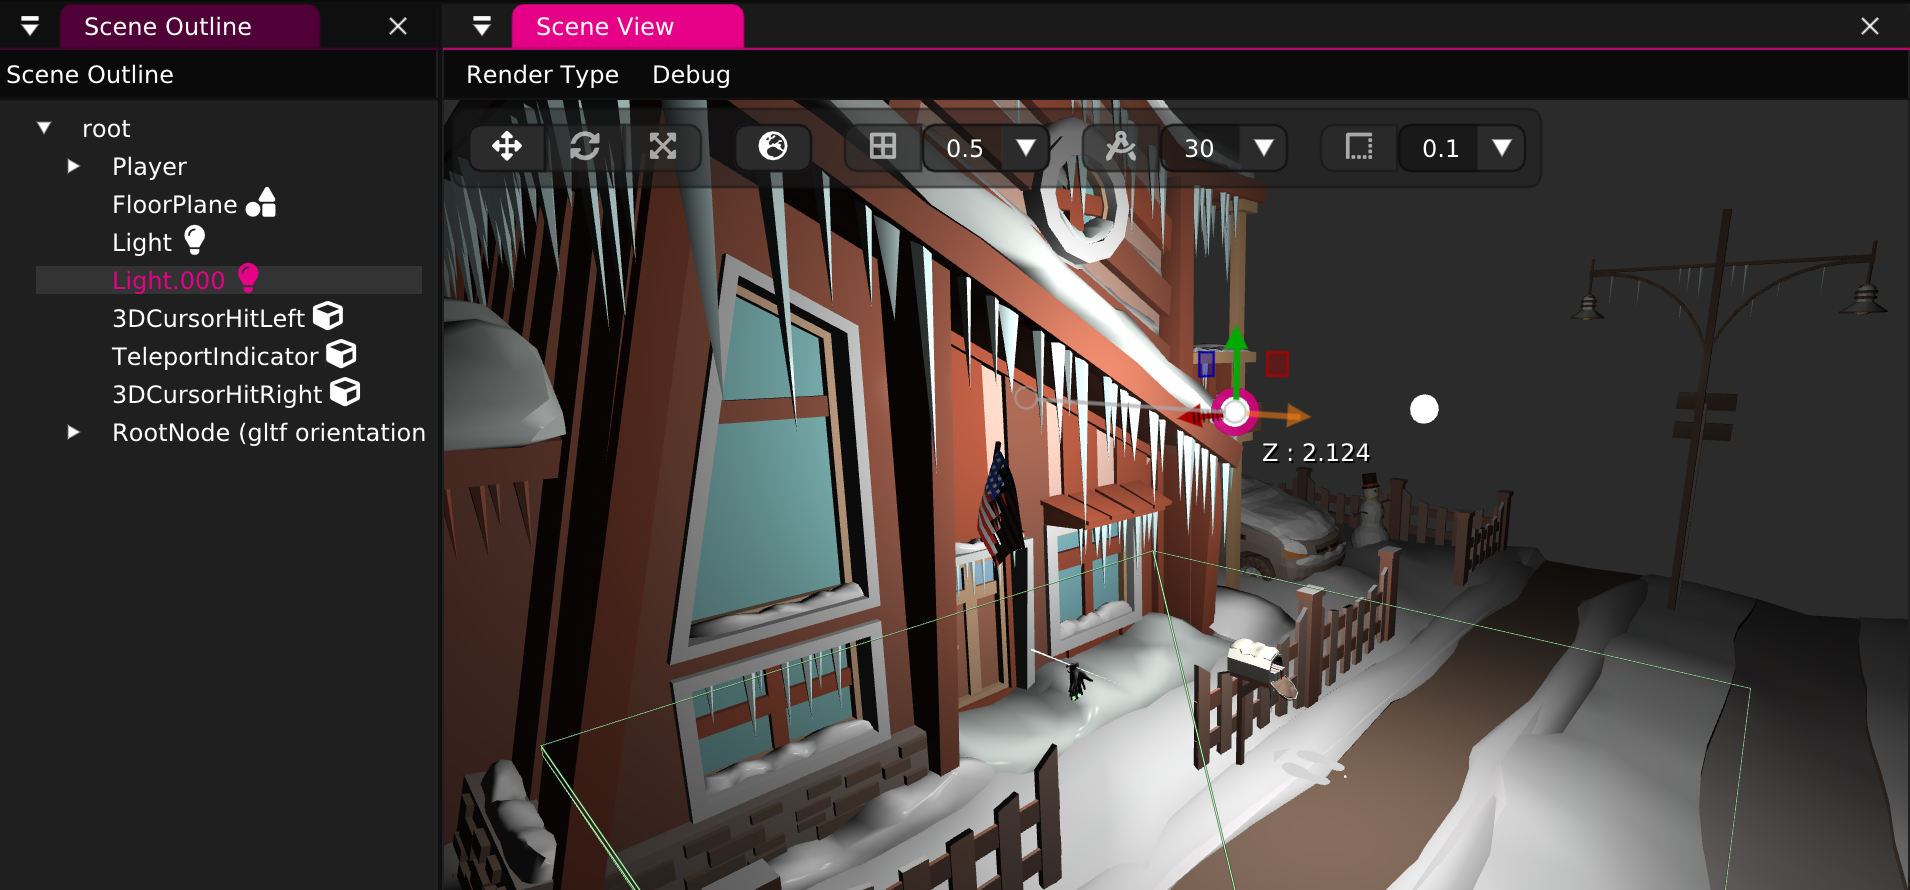
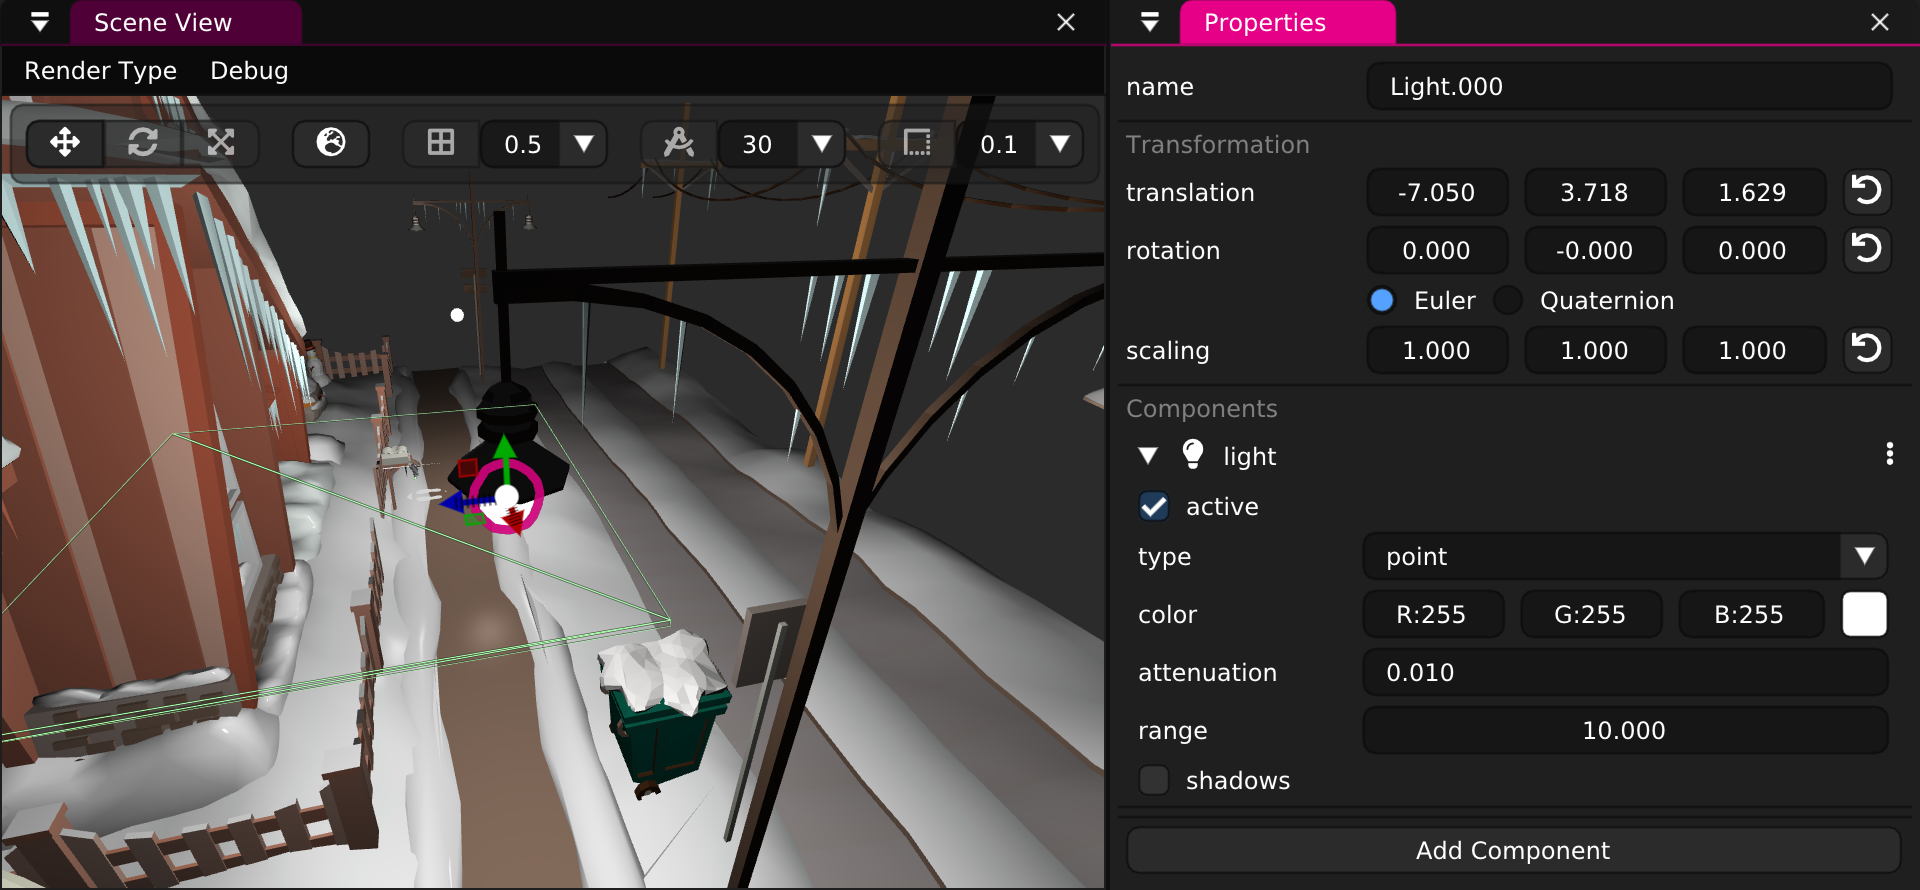
Position the Lights
The lights now feel out of place for this new scene.
To move them somewhere useful, select one in the “Scene Outline” and use the “translation gizmo” handles to drag the light around the 3D scene.
If you don’t have the arrows for translation, you can switch gizmo type using the following keys:
- G (“Grab”): position gizmo
- R (“Rotate”): rotation gizmo
- S (“Scale”): scaling gizmo
Double tap G to toggle translation in local vs world space.
You can also use the toolbar at the top of the Scene View:

Component Properties
The “Light” object makes light, because it has a “light” component attached to it. You can make the light brighter by reducing the “intensity” property of the light component:
Summary
While this scene only has a few objects, Wonderland Engine is great at rendering many different meshes. See the Scene Optimization Example.
You can continue by adding custom behaviour with your own JavaScript components.
Or you may want to add VR controller support.