Quick Start - AR with 8th Wall
This tutorial covers how to use wonderland-ar-tracking together with 8th Wall.
You can use any of 8th Wall’s supported tracking capabilities:
- SLAM tracking
- Image tracking (flat and cylindrical)
- Face tracking
- VPS (world tracking with pre-scanned mesh for occlusion)
Install Project Templates
Download the wonderland-ar-tracking
repository, either as ZIP (<> Code > Download ZIP), or clone it with git.
Extract the folder and copy the “SLAM-camera” folder from examples into your templates folder.
The templates folder will be located in the following location, depending on your operating system:
- Windows:
%APPDATA%/WonderlandEngine(%APPDATA%can be typed in the path bar of Windows Explorer and resolves toC:\Users\<Username>\AppData\Roaming) - MacOS:
~/Library/Application Support/WonderlandEngine(~is your home folder) - Linux:
~/.WonderlandEngine/
Creating a Project
If you set up the template correctly, you should see the following when creating a new project in Wonderland Editor:
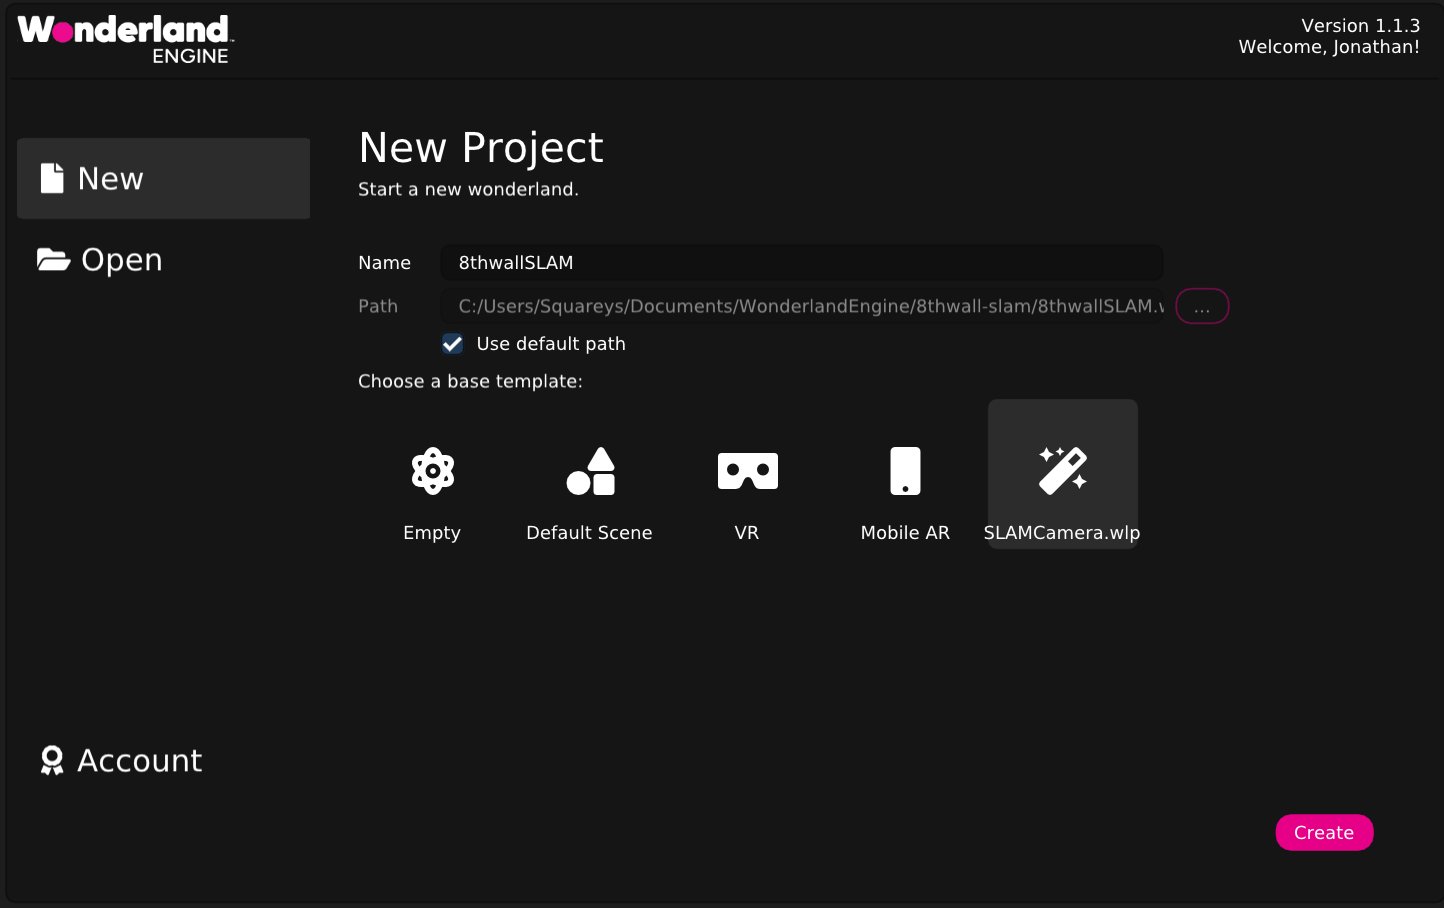
With the new template selected, you can create a project.
Testing
To test the project locally, 8th Wall requires you to set up local certificates, since they block serving without HTTPS.
Set Up SSL Certificates
To generate your own SSL certificates for localhost, open Views > Preferences > Server and click Generate Certificates.
The preference values will be set up automatically.
Finally, restart the server: Stop the server by clicking on “localhost:8080” at the top of the editor window, clicking “Stop Server”. Then click on “not running”, then “Start Server” to start the server again.
View on Smartphone
For Android:
- Ensure you have “USB Debugging” enabled on your device.
- Connect your device via USB.
- Select “Local Device” to trigger the “Allow USB Debugging” dialog on your device.
- Once approved, you can select the device in the dropdown.
- Check the “SSL” checkbox.
- Hit the green arrow to launch the browser with the page on your smartphone.
For iOS:
- Connect your iOS device and Mac to the same Wi-Fi network.
- On your Mac, find your Mac’s name: Go to
System Preferences > Sharingto find your Mac’s name. - (optional) Install the SSL certificates we generated above on your iOS device: Either email the certificate to yourself and install it via the Mail app, or by using Apple Configurator.
- (optional) Trust the installed certificate on your iOS device by navigating to
Settings > General > About > Certificate Trust Settings. - Open Safari on your iOS device: Type the URL
http://YourMacName.local:8080orhttps://YourMacName.local:8081if using SSL.
Publishing
To publish your 8th Wall-based experience, you will need to replace the 8th Wall API Token in src/index.js.
Create an 8th Wall Project
- Create an account at 8thwall.com. On your 8th Wall Dashboard, click “Start a new project”.
- Select “Self-Hosted”.
- Set a project name and a “License Type” that matches your needs.
- Click “Create”.
- Add domains you host on at “Setup Domains”.
- Go to “Settings” (Cog symbol on the left)
- Copy the app key from the “My App Key” section.
Paste the app key in the src/index.js file: Replace the value of window.API_TOKEN_XR8 = '<here>';.