Multi-User Server Development Flow
Introduction
This page walks you through the expected development flow when developing Multi User Wonderland Cloud applications.
Development Servers
We start with creating a new development server from the Wonderland Cloud UI. Please refer to this page if you don’t know how to do this.
To make things easier, we are using the Simple Multi-User Example from the Wonderland Cloud examples repo.
Clone the repo to your local machine:
git clone https://github.com/WonderlandEngine/wonderland-cloud-examples.gitNext, navigate to wonderland-cloud-examples/simple/server and run:
yarn install
yarn global add @wonderlandcloud/cli
Now we need to add an authentication token to be able to use the Wonderland Cloud apis. For this we go to the Wonderland Engine Website.
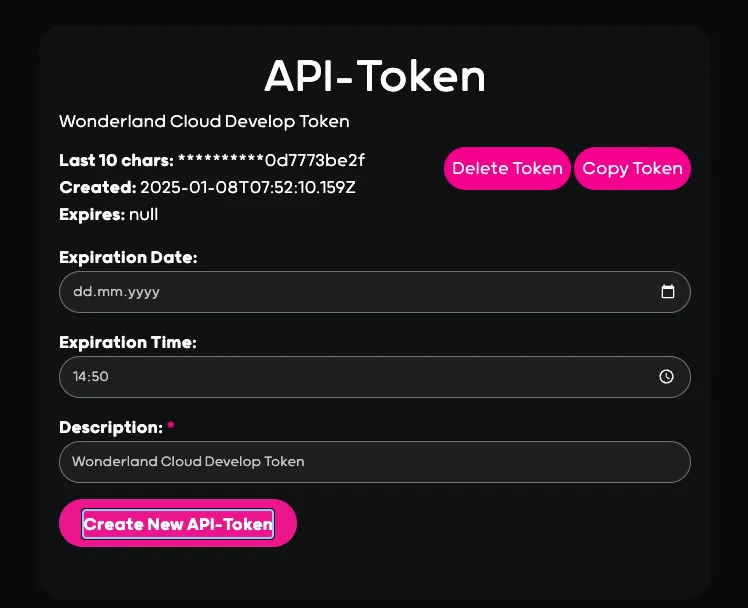
Once you click on create token, the token will be generated and the token file will be downloaded. Rename the token file to wle-apitoken.json and copy it into wonderland-cloud-examples/simple/server.
Now you can use the CLI client to connect to your created development server via (change the server name accordingly):
wl-cloud server debug <your-debug's-server-name>This will start your develop server, package your server code and upload the package to your server. All logs made in your server code are automatically stream to your local console.
1/16/2025, 11:30:52 AM Server scheduled for start
1/16/2025, 11:31:03 AM ...
1/16/2025, 11:31:13 AM ...
1/16/2025, 11:31:24 AM ...
1/16/2025, 11:31:35 AM Server started!
1/16/2025, 11:31:35 AM Waiting for server to be up and running... wss://server.wonderland.dev:443/documentation-development-develop
1/16/2025, 11:31:35 AM Server is reachable, establishing debug connection.
1/16/2025, 11:31:35 AM Creating new WS client connection wss://server.wonderland.dev:443/documentation-development-develop
1/16/2025, 11:31:36 AM authenticating...
1/16/2025, 11:31:37 AM Created websocket keep alive ping interval
1/16/2025, 11:31:37 AM {"authenticated":true,"id":"ba80ad72-49bd-463b-a465-bb04f3fc53c6"}
1/16/2025, 11:31:38 AM Finished packing files!
1/16/2025, 11:31:38 AM Listening for file changes...
1/16/2025, 11:31:39 AM Got response from server { message: 'upload and restart finished!' }
> 1/16/2025, 11:31:42 AM Loading local package {"path":"/server/uploads/3ce8ea440ff5d5ee6ded8126eb065fae"}
1/16/2025, 11:31:42 AM Installing server package {"filepath":"/server/uploads/3ce8ea440ff5d5ee6ded8126eb065fae","packageName":"@example/simple-server"}
1/16/2025, 11:31:42 AM loaded server class {}
1/16/2025, 11:31:42 AM Server class info @example/simple-server [class MetaverseServer extends MultiUserServer2] MetaverseServer MultiUserServer2 {} [Function: _isMultiUserServer]
1/16/2025, 11:31:42 AM Found server class {"className":"MetaverseServer"}
1/16/2025, 11:31:42 AM Metaverse server started
1/16/2025, 11:31:42 AM Server successfully started! {}
1/16/2025, 11:31:42 AM server started
If you make a change to your code, like in the example below, the changes are pushed to the develop server instantly. Additionally, a reconnect signal is sent to all connected clients, making it easy to rapidly develop your application.
export class MetaverseServerChanged extends MultiUserServer {
  //...
  constructor() {
    super();
    console.log("Multi User Server Started");
  }
  //...
}
...
1/16/2025, 11:35:47 AM Found server class {"className":"MetaverseServerChanged"}
1/16/2025, 11:35:47 AM Multi User Server Started
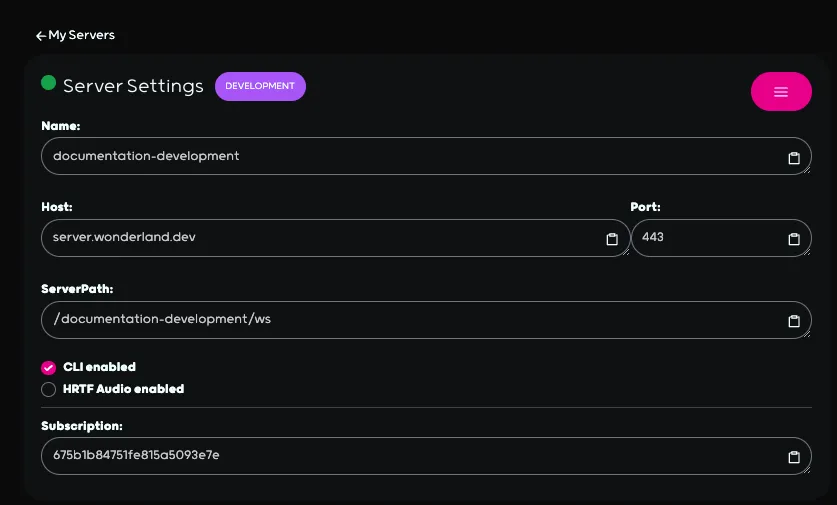
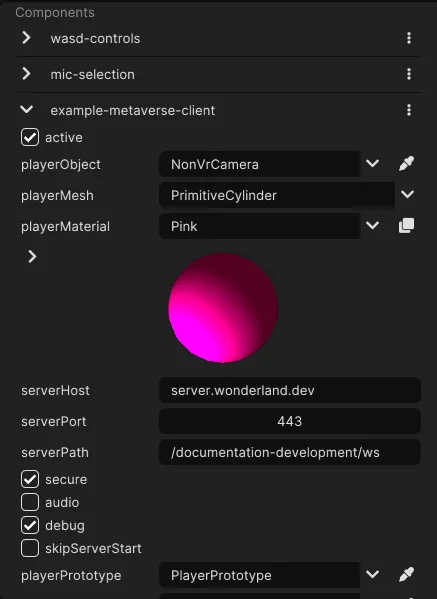
...Now that your development server is up and running, it’s time to connect to it via the @wonderlandcloud/client. For this, please open the NetworkTest.wlp from wonderland-cloud-examples/simple/client and navigate to the client settings.
Then replace the serverPath and the serverHost values according to your previously created develop server. Check the secure option and leave port at 443.
Once applied, click Run to start your frontend client. If you did everything correctly, you should get a log message with User Joined.
...
1/8/2025, 3:49:51 PM User joined 81GdpFqRZf
...
That’s it, now you are all set to develop amazing multiplayer WebXR experiences with WonderlandEngine and Wonderland Cloud!
Production Server
Once you have finished the deployment of your server, you can simply create a package by running npm pack and upload via the create server form. Alternatively you can upload your server via the command below:
wl-cloud server create <yourservername>Just make sure that your server class is exported as a default export on top level of you package. Additionally you should bundle your code and all dependencies into a single file. You can copy paste the configuration for this from the examples repo.
import { MetaverseServer } from "./metaverse";

export default MetaverseServer;